
To get started, navigate to Marketing > Banners in your store admin. From here you can either choose to edit an existing banner, or click on the "Create a Banner" button to make a new one.
Next you will want to go into the HTML mode by clicking on the "HTML" button in the upper right hand corner of the editor.

This will open a pop up editor where you can enter HTML code. Next, copy the below HTML and paste it into this pop up editor.
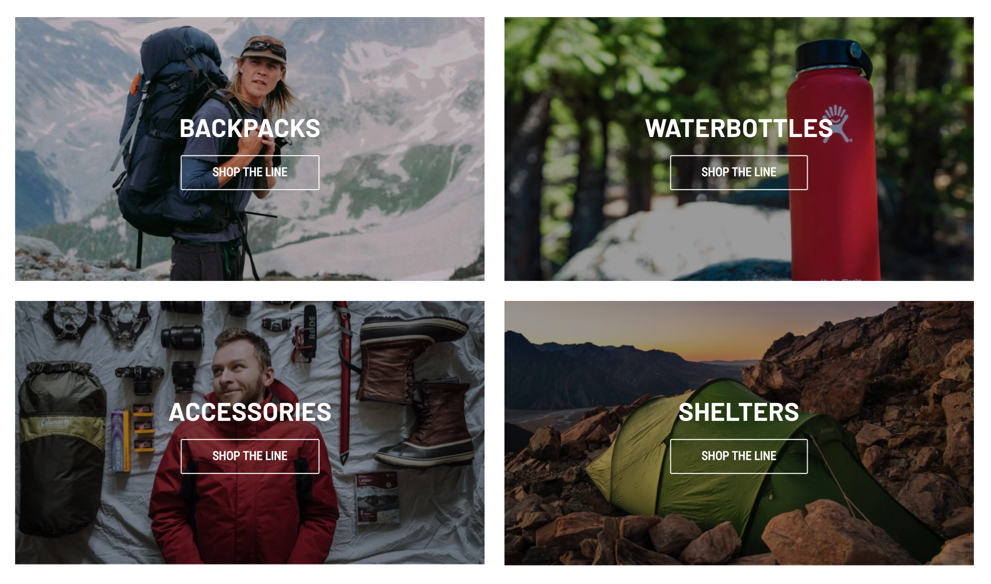
<div class="featured-categories">
<div>
<img title="Backpacks" src="https://cdn11.bigcommerce.com/s-cpvne3/product_images/uploaded_images/category01b.jpg" alt="Backpacks" />
<div class="featured-categories--text">
<h2>Backpacks</h2>
<span class="button">Shop the line</span>
</div>
<a class="overlay-link" href="https://roots-default-demo.mybigcommerce.com/packs/"> </a>
</div>
<div>
<img title="Waterbottles" src="https://cdn11.bigcommerce.com/s-cpvne3/product_images/uploaded_images/category02.jpg" alt="Waterbottles" />
<div class="featured-categories--text">
<h2>Waterbottles</h2>
<span class="button">Shop the line</span>
</div>
<a class="overlay-link" href="https://roots-default-demo.mybigcommerce.com/hydration/water-bottles/"> </a>
</div>
<div>
<img title="Accessories" src="https://cdn11.bigcommerce.com/s-cpvne3/product_images/uploaded_images/category03.jpg" alt="Accessories" />
<div class="featured-categories--text">
<h2>Accessories</h2>
<span class="button">Shop the line</span>
</div>
<a class="overlay-link" href="https://roots-default-demo.mybigcommerce.com/tents-shelters/tent-accessories/"> </a>
</div>
<div>
<img title="Shelters" src="https://cdn11.bigcommerce.com/s-cpvne3/product_images/uploaded_images/category04.jpg" alt="Shelters" />
<div class="featured-categories--text">
<h2>Shelters</h2>
<span class="button">Shop the line</span>
</div>
<a class="overlay-link" href="https://roots-default-demo.mybigcommerce.com/tents-shelters/tents/"> </a>
</div>
</div>
Before clicking on the "Update" button (which will close the pop up HTML editor), you can easily customize the category names and add in your custom link addresses while still in the HTML editor. The category names are wrapped inside of <h2> elements, and the links are inside the href attribute of the <a> elements.
Once you have customized the text and links you can click on the "Update" button and you will see your content displaying inside the visual editor.*
The visual editor view is best for updating images, highlight the demo images and replace them with your own custom images. The recommended size for these images is 645px wide by 360px tall. The height is less important than the width so if it makes more sense for your store to have shorter images that will work just as well.
Once you've finished customizing the content for your site you can choose which page you want the banner to display on and if you would like it to show in the top or bottom banner position. Click on the "Save" button to finalize your changes and make the banner live.
* Note that that the content in the visual editor view won't look how it will look on your website. There are styles included in the theme which position the elements correctly based on the HTML used but these styles are not applied in the banner visual editor.